Encountering a flat tire during a bike ride can be frustrating, but with the right approach and some practice, you’ll handle the situation like a pro. This guide outlines the step-by-step process for getting back on the road quickly, using basic tools and proven techniques. Whether you’re commuting through city streets or exploring remote trails, mastering the art of roadside repair ensures uninterrupted mobility and enhances your overall riding experience.
Essential Tools and Preparation
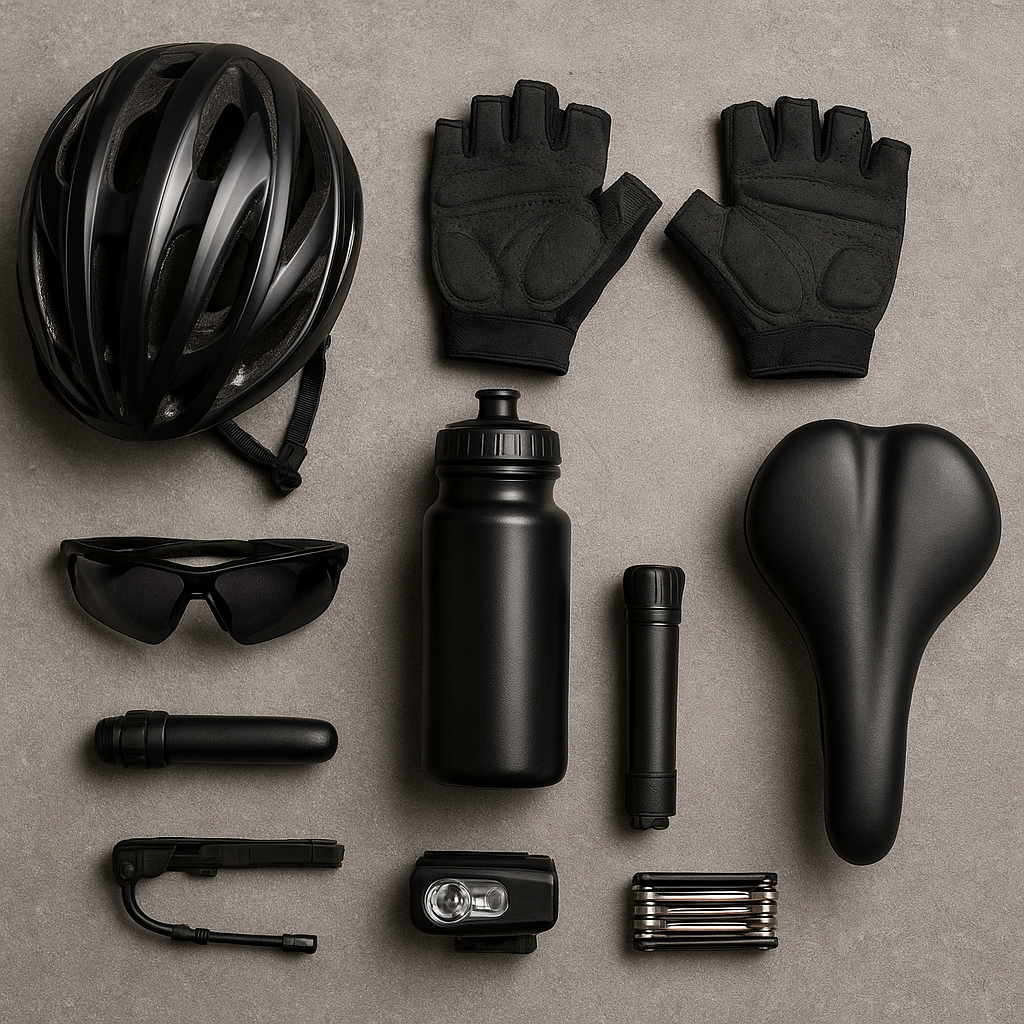
Before you even hop onto your bicycle, it’s crucial to carry a compact repair kit. A well-equipped kit typically includes:
- Tire levers – for removing the tire from the rim without damage
- Patch kit – to mend small punctures in your inner tube
- A spare inner tube – as a fast replacement when patching isn’t feasible
- A portable pump or CO₂ inflator – to restore proper pressure
- A small bottle of tire sealant (optional) – effective for tubeless setups or temporary fixes
Storing these items in a saddle bag or jersey pocket ensures they’re always at hand. Familiarize yourself with each component before hitting the road, practicing the motions at home so that you remain calm when a real flat occurs.
Removing and Inspecting the Tire
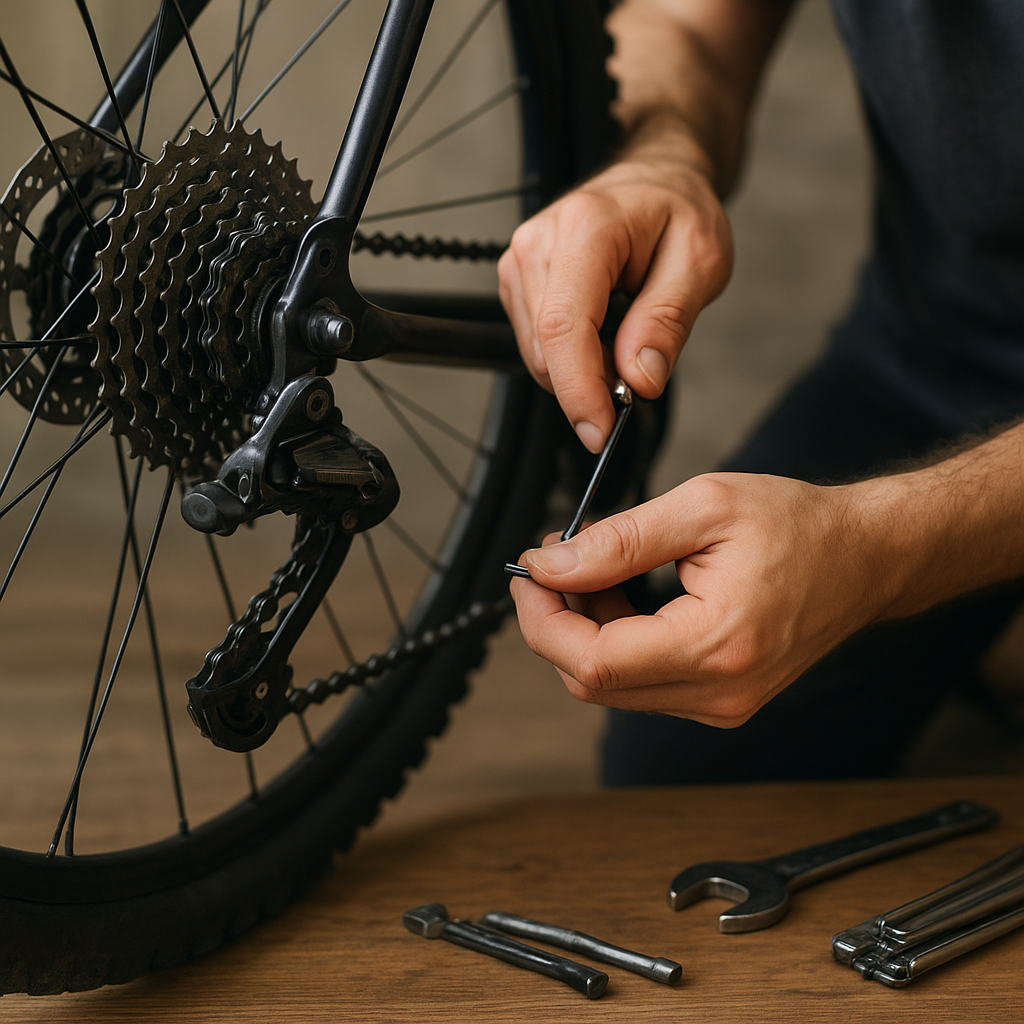
The first step in any roadside repair is to safely immobilize your bike:
- Sit the bike on its side, preferably on a grassy or soft surface to avoid scratching the frame and drivetrain.
- If you have quick-release skewers, open them to loosen the wheel. For bolt-on axles, use the appropriate wrench or Allen key.
Once the wheel is off, deflate any remaining air by pressing the valve. Use two tire levers to pry one side of the tire bead away from the rim. Hook one lever onto a spoke to keep it in place, then work the second lever around the circumference until one side of the tire is completely free.
Remove the inner tube and give it a quick inflation (by mouth or pump) to locate the puncture. Listen and feel for escaping air, or submerge the tube in water and watch for bubbles. Mark the hole with chalk or a small piece of tape.
Fixing the Flat: Patch or Replace
Now that you have pinpointed the leak, decide whether to patch the tube or swap in a spare. While patches are lightweight, they take a few minutes to cure and may be less reliable under high pressure. A fresh inner tube, on the other hand, guarantees quick restoration of rideability.
Using a Patch Kit
- Roughen the area around the hole with the included abrasive tool.
- Apply a thin layer of vulcanizing glue and wait until it becomes tacky.
- Carefully position the patch over the leak, pressing firmly for at least 30 seconds.
- Allow a minute of curing before reinflating the tube slightly to check for leaks.
Installing a Spare Tube
- Partially inflate the new tube so it takes shape but remains flexible.
- Slip the valve stem through the valve hole in the rim.
- Seat the tube inside the tire, working your fingers around the bead to tuck it beneath the flange.
- Use your thumbs—not tire levers—to push the final section of bead back onto the rim, avoiding tube pinches.
Safety tip: Double-check that no part of the tube is trapped between the bead and rim, as this can cause a second flat almost immediately after inflation.
Reassembling and Final Touches
With the tube installed or patched, it’s time to restore pressure and get rolling again. Attach your pump or CO₂ cartridge and inflate to the manufacturer’s recommended PSI, which is usually printed on the tire sidewall. Pay attention to the following:
- Ensure the tire bead sits evenly around the rim, preventing wobbles or bulges.
- Check the valve stem remains straight to avoid fracture when inflating.
- Feel for any lingering slow leaks by listening closely or applying soapy water to the valve area.
Once fully inflated, reinstall the wheel on your frame or fork. Tighten the quick-release lever or axle nuts securely, but avoid over-torquing. Spin the wheel to verify it rotates freely without rubbing against brake pads or frame components. Give the tire a final squeeze to confirm firmness. Your ride is now safe and stable, ready to continue.
Maintenance Tips to Prevent Future Flats
Regular upkeep can dramatically reduce the likelihood of roadside mishaps. Consider these best practices:
- Inspect tires for cuts, embedded glass, or thorns before each ride.
- Maintain correct pressure within the recommended range for your tire width and terrain.
- Replace tires with worn tread or sidewall damage promptly.
- Use high-quality sealant for tubeless setups to automatically seal minor punctures.
- Practice changing a tire at home to build speed and confidence.
Equipped with these strategies and a basic repair kit, you’ll conquer flats swiftly and safely, ensuring each ride remains enjoyable and uninterrupted.