Maintaining and cleaning hydraulic disc brakes is essential for ensuring the longevity and performance of your bicycle. This article will guide you through the steps necessary to keep your hydraulic disc brakes in top condition, covering everything from basic cleaning to more advanced maintenance techniques.
Understanding Hydraulic Disc Brakes
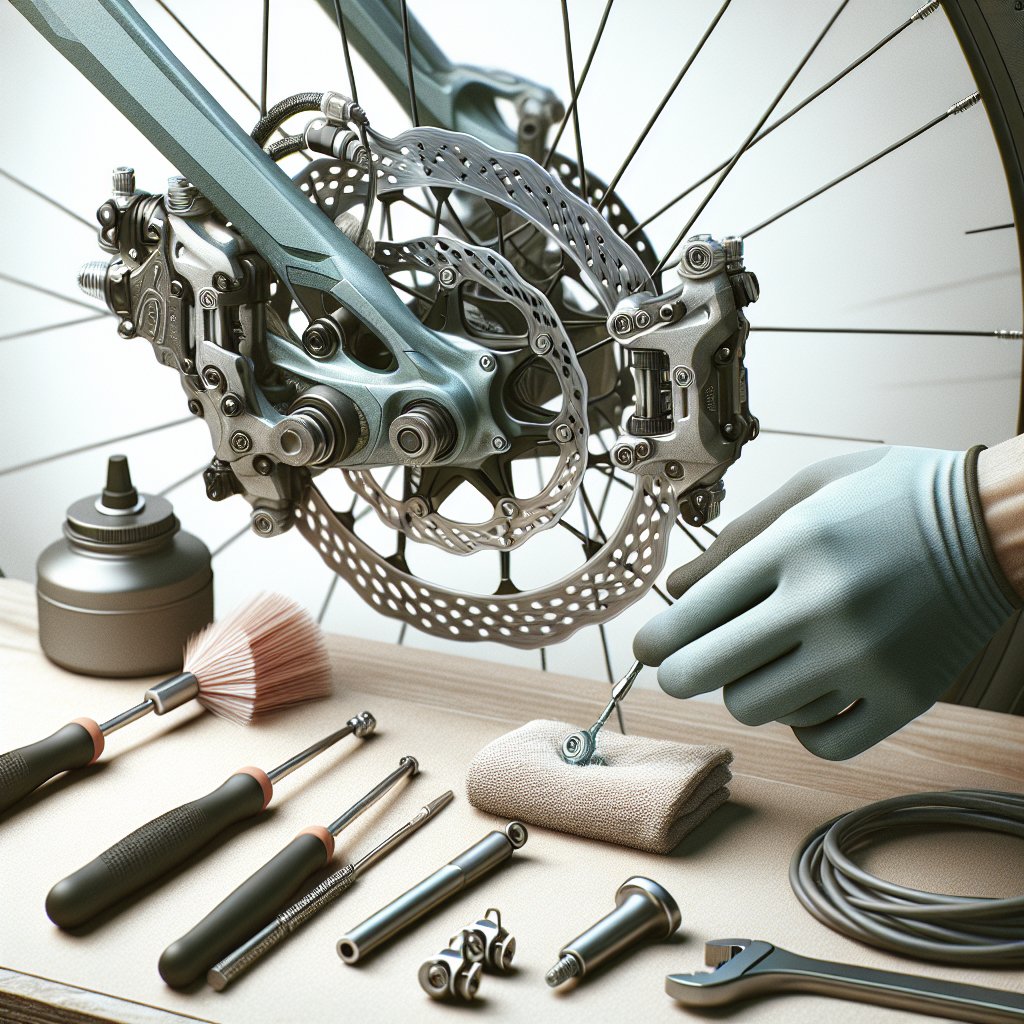
Hydraulic disc brakes are a popular choice among cyclists due to their superior stopping power and reliability. Unlike mechanical disc brakes, which use a cable to actuate the brake pads, hydraulic disc brakes use fluid to transfer force from the brake lever to the caliper. This system provides more consistent braking performance and requires less manual adjustment over time.
Components of Hydraulic Disc Brakes
Before diving into the cleaning and maintenance process, it’s important to understand the key components of hydraulic disc brakes:
- Brake Lever: The part you squeeze to initiate braking.
- Brake Hose: The conduit through which hydraulic fluid travels.
- Caliper: The mechanism that houses the brake pads and pistons.
- Brake Pads: The components that press against the rotor to create friction and slow the bike.
- Rotor: The disc attached to the wheel that the brake pads clamp onto.
Basic Cleaning of Hydraulic Disc Brakes
Regular cleaning of your hydraulic disc brakes is crucial for maintaining their performance. Dirt, grime, and brake dust can accumulate on the components, leading to reduced braking efficiency and increased wear. Follow these steps for a basic cleaning:
Tools and Materials Needed
- Isopropyl alcohol or a dedicated disc brake cleaner
- Clean, lint-free cloths
- Soft-bristled brush
- Water and mild soap
- Rubber gloves (optional)
Step-by-Step Cleaning Process
- Remove the Wheel: Start by removing the wheel from your bike to access the rotor and caliper more easily.
- Clean the Rotor: Spray isopropyl alcohol or disc brake cleaner onto a clean cloth and wipe down the rotor. Make sure to clean both sides thoroughly. Avoid touching the rotor with your bare hands to prevent contamination.
- Clean the Caliper: Use a soft-bristled brush to remove any dirt or debris from the caliper. You can also use a cloth dampened with isopropyl alcohol to wipe down the caliper body.
- Inspect the Brake Pads: Check the brake pads for any signs of wear or contamination. If they are dirty, you can lightly sand them with fine-grit sandpaper or replace them if they are worn out.
- Reassemble the Wheel: Once everything is clean, reattach the wheel to your bike and ensure it is properly aligned.
Advanced Maintenance Techniques
In addition to regular cleaning, hydraulic disc brakes require periodic maintenance to ensure optimal performance. This includes tasks such as bleeding the brakes, replacing brake pads, and checking for leaks. Below are some advanced maintenance techniques to keep your hydraulic disc brakes in top shape.
Bleeding the Brakes
Over time, air can enter the hydraulic system, leading to spongy brake feel and reduced performance. Bleeding the brakes removes air bubbles and ensures the system is filled with fresh hydraulic fluid. Here’s how to do it:
Tools and Materials Needed
- Bleed kit (specific to your brake model)
- Hydraulic brake fluid (check your manufacturer’s recommendation)
- Clean, lint-free cloths
- Rubber gloves
- Safety glasses
Step-by-Step Bleeding Process
- Prepare the Bike: Secure your bike in a work stand and remove the wheel. Position the brake lever so that the bleed port is the highest point in the system.
- Attach the Bleed Kit: Follow the instructions provided with your bleed kit to attach the syringes and hoses to the brake lever and caliper.
- Flush the System: Use the syringes to push fresh hydraulic fluid through the system, expelling any air bubbles. Continue until you see a steady stream of fluid without bubbles.
- Close the System: Once the bleeding process is complete, close the bleed ports and remove the bleed kit. Wipe down any excess fluid with a clean cloth.
- Test the Brakes: Reattach the wheel and test the brakes to ensure they feel firm and responsive.
Replacing Brake Pads
Brake pads wear out over time and need to be replaced to maintain effective braking performance. Here’s how to replace your brake pads:
Tools and Materials Needed
- New brake pads (compatible with your brake model)
- Allen wrench or Torx key (depending on your brake model)
- Clean, lint-free cloths
- Isopropyl alcohol or disc brake cleaner
Step-by-Step Brake Pad Replacement
- Remove the Wheel: Start by removing the wheel to access the brake caliper.
- Remove the Old Pads: Use the appropriate tool to remove the retaining pin or bolt holding the brake pads in place. Slide the old pads out of the caliper.
- Clean the Caliper: Wipe down the inside of the caliper with a cloth dampened with isopropyl alcohol to remove any dirt or debris.
- Install the New Pads: Insert the new brake pads into the caliper, making sure they are properly aligned. Secure them with the retaining pin or bolt.
- Reassemble the Wheel: Reattach the wheel and ensure it is properly aligned. Test the brakes to make sure they are functioning correctly.
Common Issues and Troubleshooting
Even with regular cleaning and maintenance, you may encounter issues with your hydraulic disc brakes. Here are some common problems and their solutions:
Squeaking or Squealing Brakes
Squeaking or squealing brakes can be caused by contamination, misalignment, or worn brake pads. To address this issue:
- Clean the Rotor and Pads: Use isopropyl alcohol or disc brake cleaner to thoroughly clean the rotor and brake pads.
- Check Alignment: Ensure the caliper is properly aligned with the rotor. Adjust if necessary.
- Replace Worn Pads: If the brake pads are worn out, replace them with new ones.
Spongy Brake Feel
A spongy brake feel is often caused by air in the hydraulic system. To fix this issue, you will need to bleed the brakes as described in the advanced maintenance section.
Brake Lever Pulls to the Handlebar
If the brake lever pulls all the way to the handlebar without providing adequate braking force, it could be due to worn brake pads or a leak in the hydraulic system. To address this issue:
- Check Brake Pads: Inspect the brake pads for wear and replace them if necessary.
- Inspect for Leaks: Check the brake hose and connections for any signs of fluid leakage. If you find a leak, you may need to replace the affected components or seek professional help.
Conclusion
Maintaining and cleaning your hydraulic disc brakes is essential for ensuring safe and reliable braking performance. By following the steps outlined in this article, you can keep your brakes in top condition and address any issues that arise. Regular cleaning, periodic bleeding, and timely replacement of brake pads will help you enjoy a smooth and responsive ride. Remember, if you encounter any problems that you are not comfortable addressing yourself, it’s always a good idea to seek assistance from a professional bike mechanic.