Mastering the art of bicycle gear adjustment can transform your ride, making each pedal stroke smoother and more efficient. Properly tuned gears ensure precise shifting, reduce wear on components, and enhance overall performance. Whether you’re tackling steep climbs or sprinting on flat roads, understanding how to fine-tune your drivetrain will elevate your cycling experience to a professional level.
The Basics of Bike Gear Systems
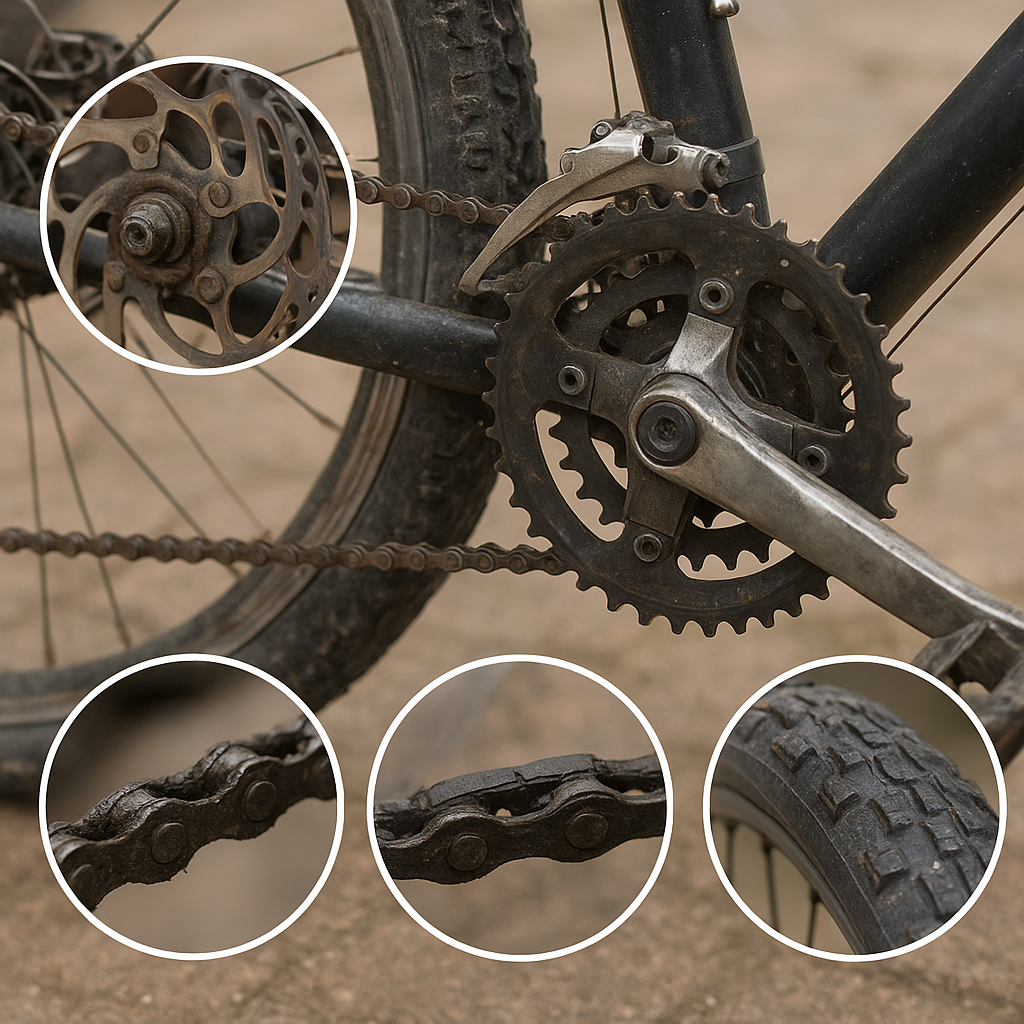
Modern bicycles employ either a derailleur system or an internal hub design. Most road and mountain bikes use derailleurs to move the chain across a series of cogs on the rear cassette and chainrings at the crankset. Key components include:
- Chain: Transfers power from the pedals to the rear wheel.
- Cassette: Multiple sprockets that determine gear ratios.
- Front and rear derailleurs: Mechanisms that guide the chain.
- Shifters: Controls mounted on the handlebars for changing gears.
- Cables and housing: Connect shifters to derailleurs, transmitting movement.
Correct interaction among these parts ensures reliable shifting. Understanding each element sets the stage for precise adjustments.
Essential Tools and Preparations
Before diving into adjustments, gather the right tools and prepare your workspace. A sturdy bike stand and clean environment make the process more comfortable.
- 5mm and 4mm Allen keys
- Flat-head screwdriver
- Cable cutters
- Bicycle-specific lubricant
- Rag or paper towels
- Tension measuring guide (optional)
Clean the drivetrain thoroughly with a degreaser and dry it. A clean chain and cogs allow you to observe movement clearly and prevent dirt from skewing your adjustments. Apply a thin layer of lubrication afterward to reduce friction.
Step-by-Step Gear Adjustment
1. Checking Cable Tension
Proper cable tension is vital for crisp shifts. Begin with the shifter in its highest gear (smallest rear cog). Inspect the cable for slack:
- If the cable housing is pushed too far into the derailleur, it can cause hesitation in shifting up.
- Too much exposed cable can prevent shifting down.
Use the barrel adjuster on the derailleur or shifter to fine-tune tension. Turning it clockwise will increase tension; counterclockwise will decrease it. Aim for minimal delay between shifting and engagement.
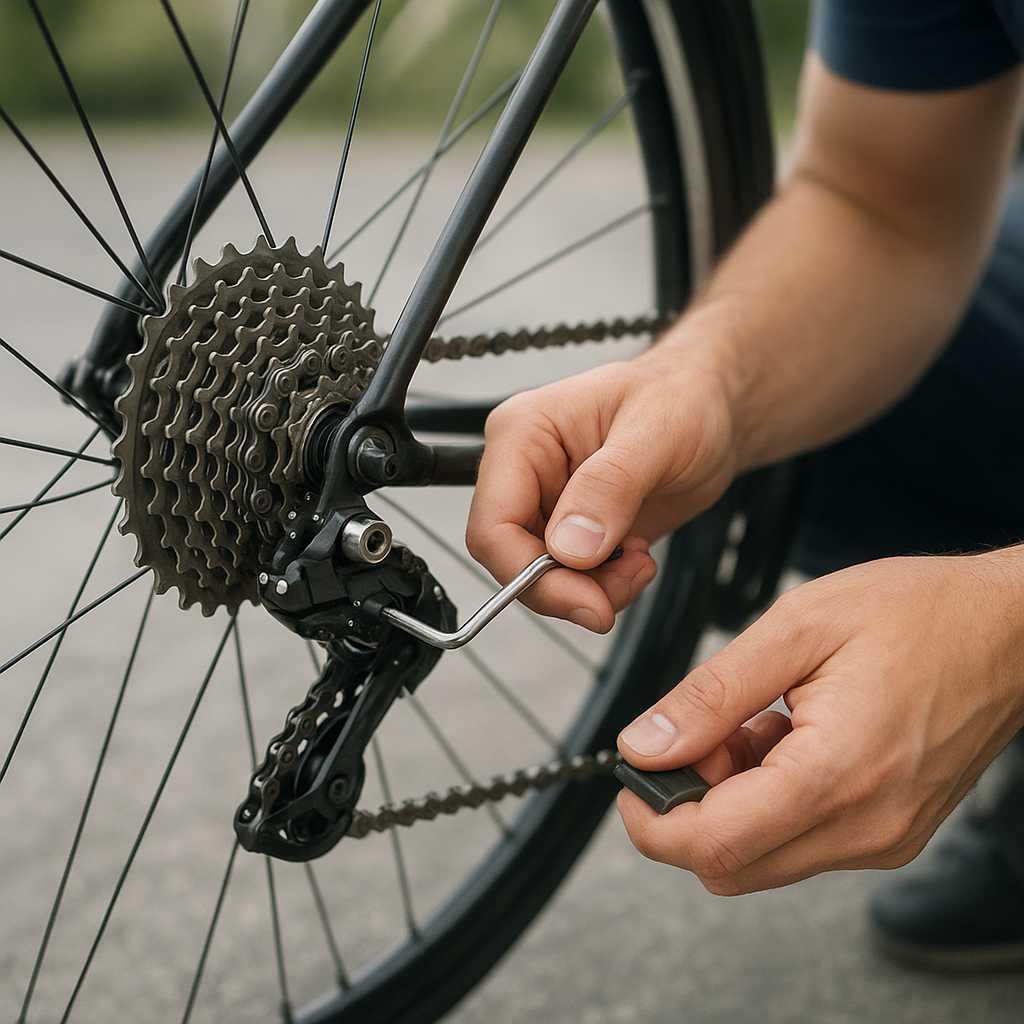
2. Adjusting Limit Screws
Limit screws prevent the chain from overshooting the smallest or largest cogs. On the rear derailleur, find the H (high) and L (low) screws:
- H-screw: Limits movement toward the smallest sprocket.
- L-screw: Limits movement toward the largest sprocket.
Shift to the smallest cog and adjust the H-screw until the derailleur’s jockey wheel aligns perfectly under the sprocket. Then shift to the largest cog and do the same with the L-screw. Proper alignment prevents chain drops and gearbox damage.
3. Indexing the Gears
Indexing ensures each click of the shifter corresponds to a precise movement of the derailleur. Follow these steps:
- Shift to middle cassette gear. Pedal slowly.
- Use the barrel adjuster to bring the chain exactly between two cogs, eliminating any rubbing noise.
- Test every gear up and down the range, making small adjustments until each gear shift is crisp and silent.
Patience pays off here—fine-tuning in small increments ensures consistent performance across the entire gear range.
Fine-Tuning and Long-Term Maintenance
Inspecting and Replacing Worn Components
Regular inspections help you catch wear before it affects performance. Look for:
- Stretched or rusted cables
- Worn chainrings with shark-tooth profiles
- Smoothed sprocket teeth on the cassette
Replacing these parts at recommended intervals (every 1,000–3,000 miles for chains) keeps shifting accurate and prolongs drivetrain life.
Cleaning and Lubrication Schedule
Maintain a routine to ensure optimal conditions:
- Weekly: Wipe down chain with a rag and reapply lubrication.
- Monthly: Remove cassette and degrease thoroughly.
- Annually: Inspect and replace cables and housing.
Consistent upkeep prevents grit buildup, which can affect tension and indexing.
Advanced Adjustments for Enthusiasts
For riders seeking further refinement, consider these techniques:
- Fine-tune B-tension screw to adjust the gap between the guide pulley and largest cog.
- Experiment with different cable housing brands to achieve crisper shifting.
- Upgrade to a lightweight derailleur cage for reduced flex under load.
These minor tweaks can yield significant performance gains for competitive cyclists or avid enthusiasts.
Conclusion
Adjusting your bike’s gears like a pro revolves around understanding the relationship between shifting components, keeping the drivetrain clean, and making precise, incremental changes. With the right tools, a structured approach, and regular maintenance, you’ll enjoy smoother shifts, less mechanical noise, and longer-lasting parts on every ride.