Packing a bicycle for air travel demands meticulous attention to detail and a solid plan. Whether you’re heading to a cycling holiday in Europe or competing in a race overseas, ensuring your bike arrives safe and sound is essential. This guide walks you through each stage, from selecting the perfect travel case to navigating airport procedures, equipping you with the knowledge to keep your frame pristine and ready to ride the moment you land.
Selecting the Right Bike Bag or Case
First and foremost, you need to choose a protective enclosure built to withstand the rigors of airline handling. Hard-shell cases, often made of high-density polyethylene or composite materials, offer the most robust protection. Soft bike bags, on the other hand, are lighter and more compact when empty but require careful internal packing to shield delicate parts.
- Hard cases: Ideal for frequent flyers and long-distance travel. Their rigid construction absorbs shocks and prevents crushing.
- Soft bags: Easier to carry and often lighter, but they depend on internal padding and strategic placement of foam blocks.
- Bike boxes: Free options from local bike shops or airlines, typically cardboard. Use only if supplemented with extra padding.
Consider dimensions and weight limits when selecting a case. Airlines often charge oversize fees for baggage exceeding 62 linear inches or 50 lb. To avoid surprise surcharges, verify your chosen case aligns with the maximum allowances of your carrier and pack your bike as compactly as possible.
Comparing Brands and Features
Not all cases are created equal. Some offer built-in wheels and telescoping handles for easy maneuvering, while others feature modular foam inserts that can be customized to snugly fit your specific bike model. Look for:
- Adjustable internal straps to secure the frame.
- Reinforced valve cores and corner bumpers.
- Lockable zippers or integrated TSA-approved locks.
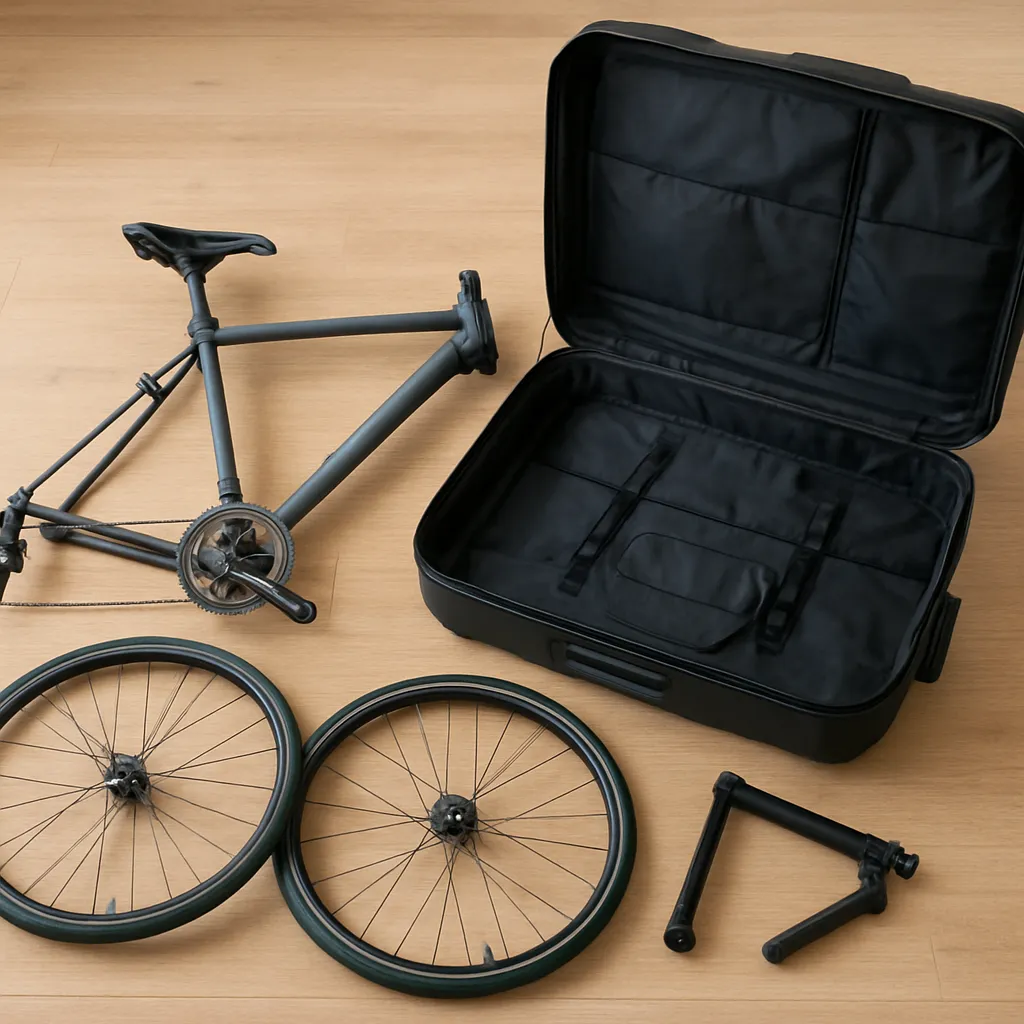
Disassembling and Preparing Your Bike
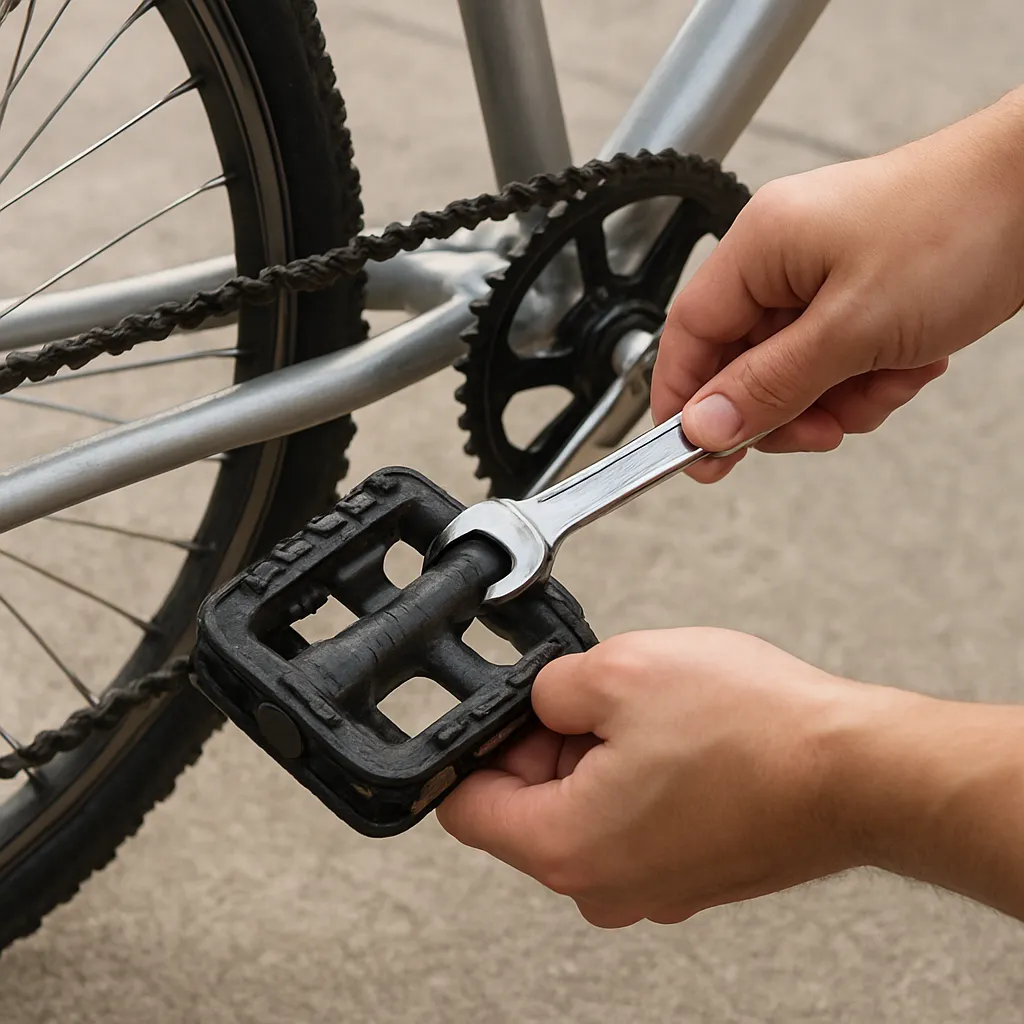
Before any packing begins, gather essential tools: an Allen key set, pedal wrench, torque wrench, and protective padding such as bubble wrap or foam tubing. Disassembly is the heart of the packing process—removing or repositioning protruding parts reduces the risk of damage in transit.
Follow these steps in order:
- Remove pedals: Use the pedal wrench to unthread pedals in the correct direction—remember the left pedal features a reverse thread.
- Take off the handlebars: Loosen the stem clamps, rotate the bars 90°, then slide them out carefully.
- Remove the wheels: Deflate tires slightly to accommodate them inside the case. Label front and rear wheels to ensure they return to their proper positions.
- Switch off any electronics: Detach cycle computers, GPS units, and lights, storing them in your carry-on bag to prevent loss or theft.
Keep all nuts, bolts, and washers in plastic packets or zip-lock bags, then tape them securely to the frame. This prevents small parts from getting misplaced during unloading and reload.
Protecting Vulnerable Components
Even after disassembly, certain parts remain at risk. Focus on padding and bracing these areas to absorb impacts.
- Frame tubes: Wrap with foam pipe insulation or bubble wrap, securing with tape to create a cushion around the main triangle.
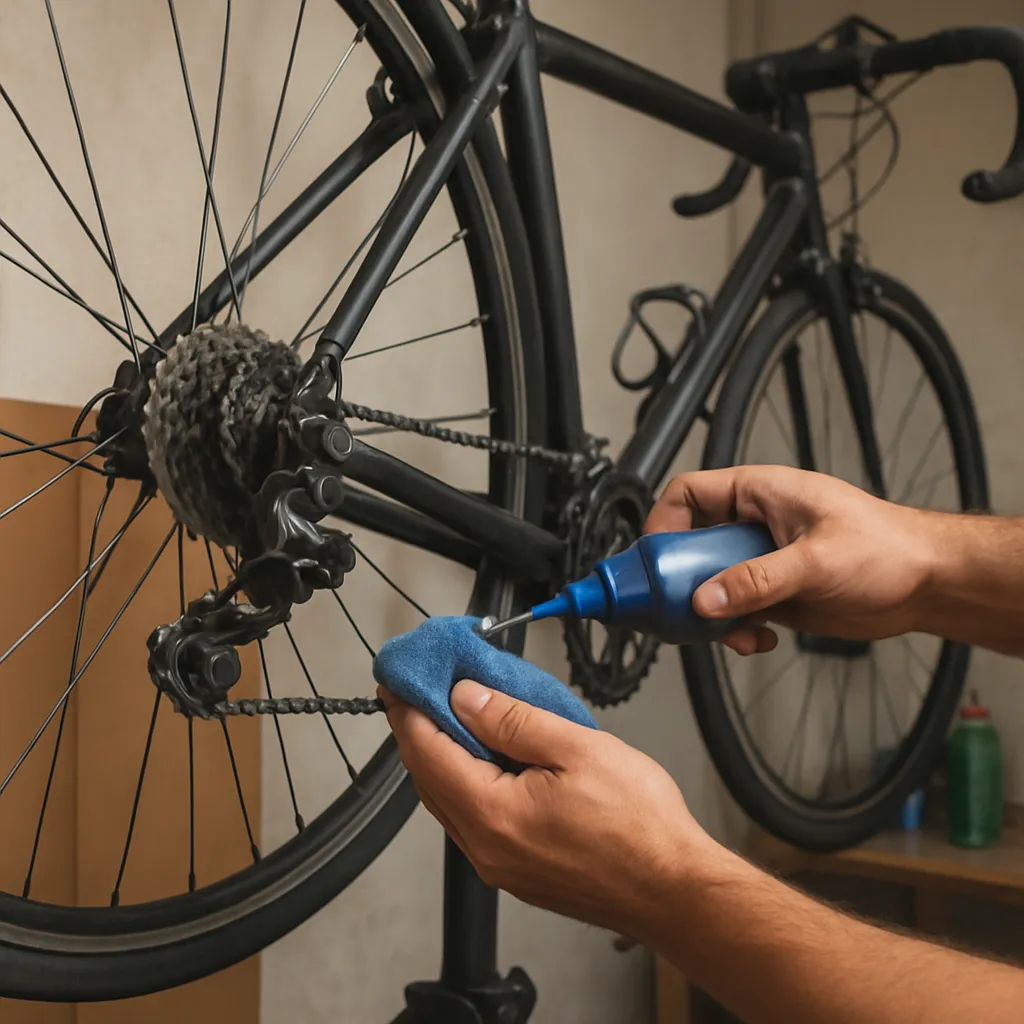
- Derailleur and chain: Shift into the smallest cog, then use a derailleur protector or a block of wood to prevent the mechanism from collapsing under weight.
- Fork and rear dropouts: Slide padded inserts or cardboard shims between the fork blades and chainstays to keep them aligned and avoid bending.
- Brakes and cables: Remove rotors if possible, or place cardboard discs on either side of disc brakes, held in place with zip-ties.
Adding custom-cut foam around these points transforms a simple bike bag into a fortress for your ride. Mark the case clearly as “fragile” to encourage gentler handling.
Packing Additional Gear and Tools
Your bike isn’t the only item requiring care. Multitools, spare tubes, CO₂ cartridges, and a mini pump can be stashed within the case if allowed by airline regulations. Always check hazardous materials restrictions—most carriers prohibit loose CO₂ canisters in checked bags.
- Tools: Pack in a small, cushioned pouch and strap to the frame or tuck into side compartments.
- Spare parts: Place extra brake pads, spokes, and derailleur hangers in labeled bags.
- Tire tubes and sealant: If traveling with pressurized sealant, carry it in sealed containers inside your carry-on.
Keep a clear inventory list taped to the inside of your case. Should any items go missing, this list helps expedite insurance claims or airline inquiries.
Transporting Your Bike Through the Airport
On the day of departure, arrive early to handle oversized baggage check-in and possible security inspections. Request assistance if you need help navigating checkpoints with a bulky bike case. Use airport-provided carts with caution—uneven surfaces can jostle delicate components.
When reclaiming your bike at your destination, inspect it before leaving the baggage area. Look for cracks, dents, or loose parts. Photograph any damage immediately and report it to the airline’s baggage claim office to start a damage report. This ensures you have the best chance of recovering repair costs.
- Keep contact information for local bike shops: They can supply emergency repairs or replacements.
- Have a portable pump and patch kit ready in your carry-on for immediate fixes once your bike is unpacked.
- Reassemble methodically, following the reverse order of disassembly. Torque bolts to manufacturer specs to avoid overtightening.
Proper packing is the difference between landing with a ride-ready bike and facing costly repairs. By selecting the right case, systematically disassembling components, and adding targeted padding, you secure your bicycle’s journey at 30,000 feet the same way you’d secure it on the open road.